

Baking Bread with Your Young Child
by Jennie Ellis, Kindergarten Teacher
Baking bread with your child is a wonderful activity to share with them. When we bake bread in our class, it takes us time as we get all the ingredients gathered together and measure them out, this is a great way to work in math and following simple directions. This bread needs to rise twice so it helps build up that patience muscle!
Have them help start to finish with clean up, table washing, wash dishes, etc.
We sing a simple bread baking song while we knead the dough. You can add or subtract to the song as you see fit.
Bread Song
This is the way we knead the dough, knead the dough, knead the dough, this is the way we knead the dough early in the morning. or evening or afternoon, whatever time you are kneading the dough :)
Then we add to it....
This is the way we pound the dough, pound the dough, pound the dough, etc etc
We do about three verses, either pounding the dough, rolling the dough, pinching the dough, etc. You can make up your own here and go on forever. Sometimes we get silly and say things like, this is the way we.....make the pizza, make the pizza, etc etc.
They really love kneading and singing this song, it really is a favorite activity for them.
Recipe
Ingredients:
2 tbsp yeast
3 cups warm liquid
1/4 cup plus 1 tbsp honey
1/3 cup oil (melted butter works)
3 tsp salt
6-8 cups of flour mixture (wheat, white-2 cups of the mixture can be oatmeal which gives a nice texture, millet, seeds, etc)
Directions:
Mix yeast, 1T honey and some warm water in a bowl. Leave it to foam up
Combine with warm liquid, oil, salt, honey and yeast mixture in a large bowl.
Add the sifted flour mixture until the liquid is absorbed. Let sit for 5 minutes.
Continue adding the flour mixture until the dough is kneadable. Knead dough and form into rolls or loaves. (Recipe should make 2 loaves or 24 rolls)
Place on a cookie sheet in a preheated 200 degree convection oven for 15 minutes to rise.
Turn up to 300 degrees and bake (rolls) for 15-20 minutes until done.
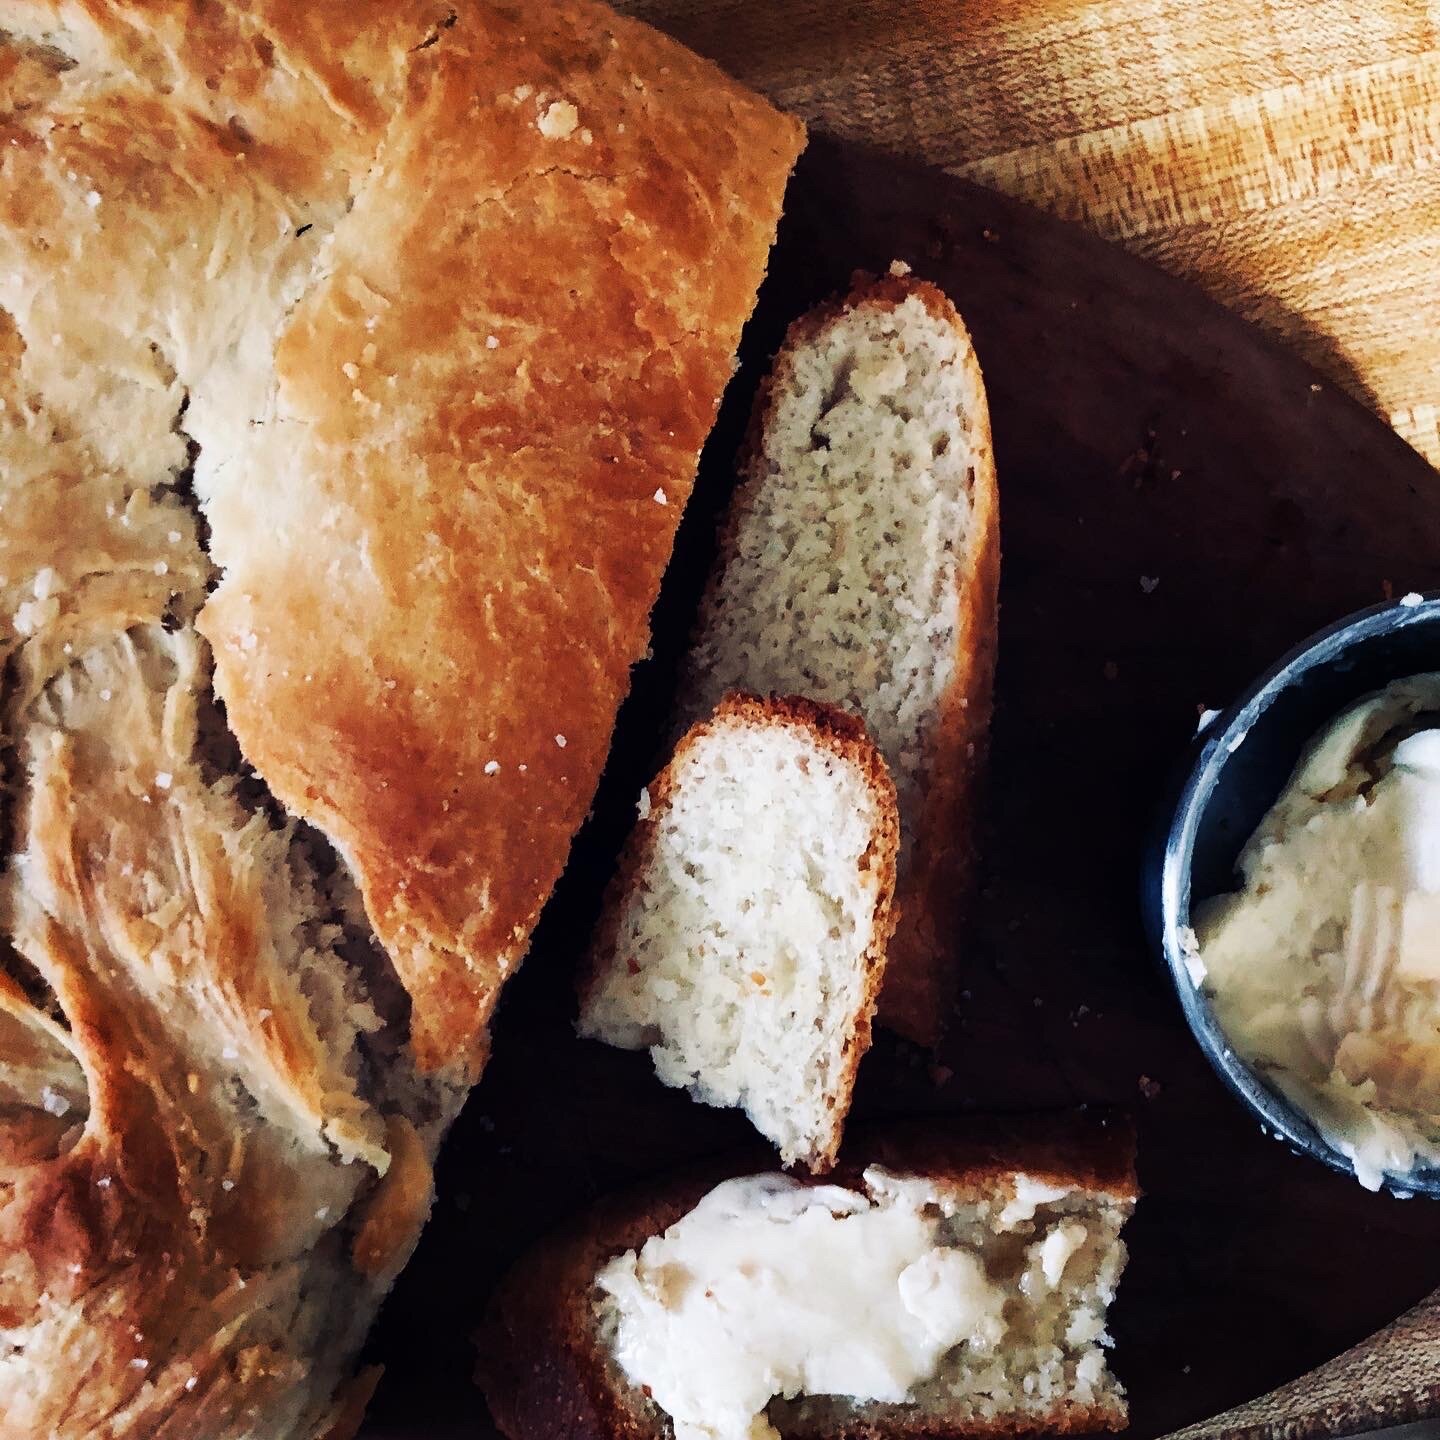
Serve warm with butter. You can even make your own! Fill a small mason jar with heavy cream and have your child shake it for 6-8minutes (great will work here!) in the end you will have butter and some buttermilk too! Of course any butter taste great, we add honey and cinnamon for a sweet treat sometimes!
Enjoy the fruits of your labor together.
Tips for Successful Learning at Home

by Kristen Henley-Hills, Movement Teacher
Good morning parents, and welcome to the new school reality, as we now know it. The world is using the term homeschooling right and left to describe parents’ new role in their children’s education. But, while that might sound kind of fun, like playing school when you were a kid, the immensity of the task on top of everything else might also seem a bit much. So, I’m here to reassure you that you are NOT homeschooling. Phew.
Fortunately, you are not responsible for finding, vetting, and organizing the materials and content your children need in their respective grades. You are not responsible for putting together the myriad educational experiences that will usher them successfully into college and beyond! That’s what WSCC is doing for you. This week will be a big one of transition for the students and teachers as we refine this dance of delivering and receiving the Waldorf curriculum.
But, of course, you do have an important role -- cruise director, site manager, and all around keeper of morale.
I homeschooled my own 3 children through the grades for 16 years total and offer these practical, simple tips for making learning at home work for everyone.
Create a schedule! This may sound so obvious, but, as you know, it takes thought and discipline to consider all the factors going on in your families right now and come up with a schedule you can actually strive to keep. This will be the backbone of harmonious times ahead. With regard to children, this means waking in enough time to eat breakfast at a regular time and do some basic chores (bed making, walking the dog, whatever your family already does or needs.) The school has already provided a schedule for Zoom classes, but we are keeping this computer time to a minimum, so time should also be built in for the work itself. Stick to it!
Create a space! Students don’t need a large space to work -- remember their desks at school? But, they should have a designated space where their supplies are handy and tidy.
Set up the space for work each day in advance of scheduled classes. Older students can absolutely lay out their things ahead of time, and the younger ones will enjoy taking this duty on. But, at first, you parents must set the stage and be sure it’s done while the habit is being set.
Consider creating meal and snack schedules. We know at school how hungry your children get. Don’t wait until moods and behavior slide -- or your child says they are hungry -- to eat. If you post a weekly snack schedule, including who is responsible for getting snacks for the whole family, it may prevent flare ups and meltdowns. Plus, it helps everyone to regulate their time and know what’s coming. I’m also a big fan of having multiple breakfasts in the rotation and posting them on a schedule.
As a corollary to the above, the same sort of thing can be done for lunch and dinner. Take advantage of this newfound time to let older children research and plan recipes they can make. One of the loveliest things about homeschooling is that it’s about your family! And everyone is a contributor to the family’s wellbeing.
As you put these plans into place, be sure you are mentally ready to execute. Parental preparation is key. Internalize your plan ahead of time and be honest with yourself about what you can follow through with. You will thank yourself for it!
How to Knit a "Roly Poly"

by Louisa Hopewell, Handwork Teacher
This project can be made with almost any size needles (3-12) and most yarns. If you can, avoid very fine yarn. A worsted weight works best!
The example I am giving is done with worsted weight yarn and size 9 wooden needles.
Cast On 8 stitches
How to cast on: Make a slip knot with your yarn leaving a 6” tail. Put the slip knot onto the needle in your left hand. Hold the free needle in your right. The cast on stitch is almost identical to the knit stitch but instead of removing the last stitch, you add it on to your left needle. I have attached a video to help you!
Once you have casted on 8 stitches you are ready to go! You knit back and forth until your Roly Poly is your desired length. I have challenged my students to continue until it is as tall as they are.
Cast off 8 stitches. I have also attached a video for help!
Weave in the extra yarn at either end.
Welcome!
Our school blog is a resource for anyone interested in learning about a well-balanced education that inspires children to be active and creative thinkers.
Sign Up
Get our weekly school blog e-mail updates:

